Custom-shaped geotextile designer
We’ll show you how to use the geotextile designer in a few steps. Don’t worry, it’s going to be very simple! #
Earlier, you had to measure the width and length of the pond bed. If you haven’t done that yet, read the guide and watch the video to see how the survey works!

You’ll need the width and length you obtained during the survey to learn how to use the rectangular geotextile designer in the next steps.
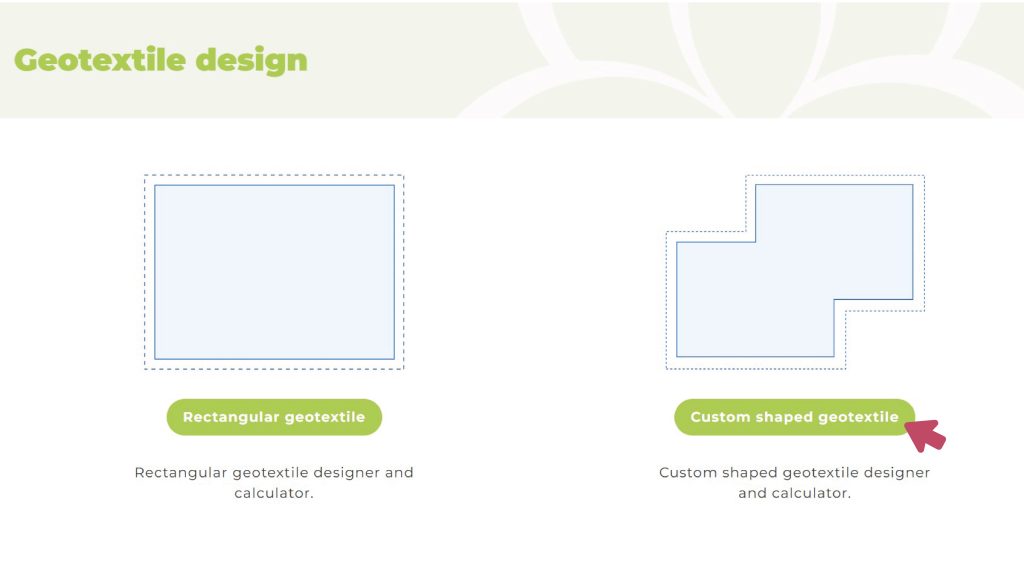
Step 1: Go to the geotextile menu and select the custom-shaped geotextile designer #
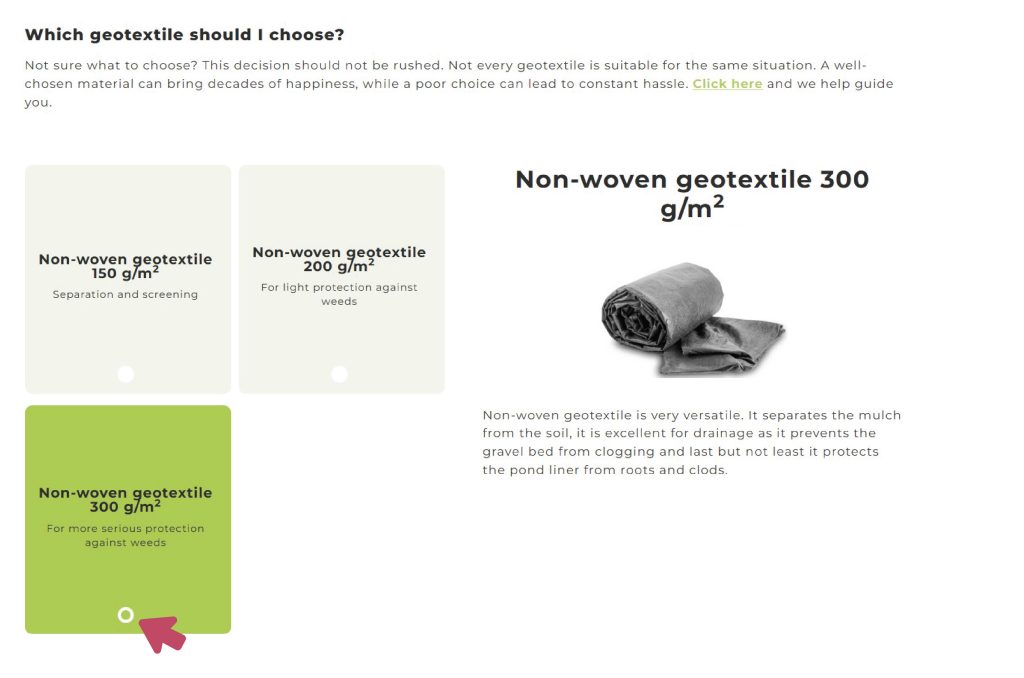
Step 2: Choose from the available geotextiles #
We’ll help you with descriptions of the features so you can select the one that suits you best.
Step 3: Enter the measured lengths into the designer #
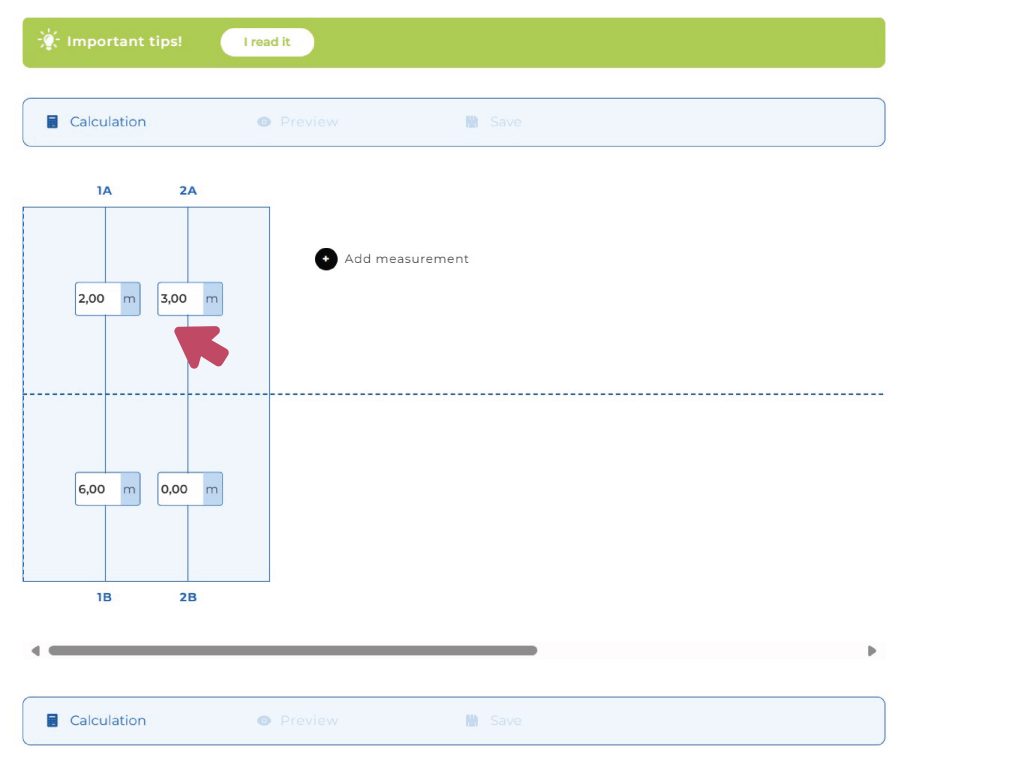
Now, enter the rib lengths you previously wrote down on paper into the designer, one by one, in the appropriate places.
Tip:
By pressing the TAB key, you can go through and enter all the values in order.
Enter the rib length labeled 1A from your paper into the designer.
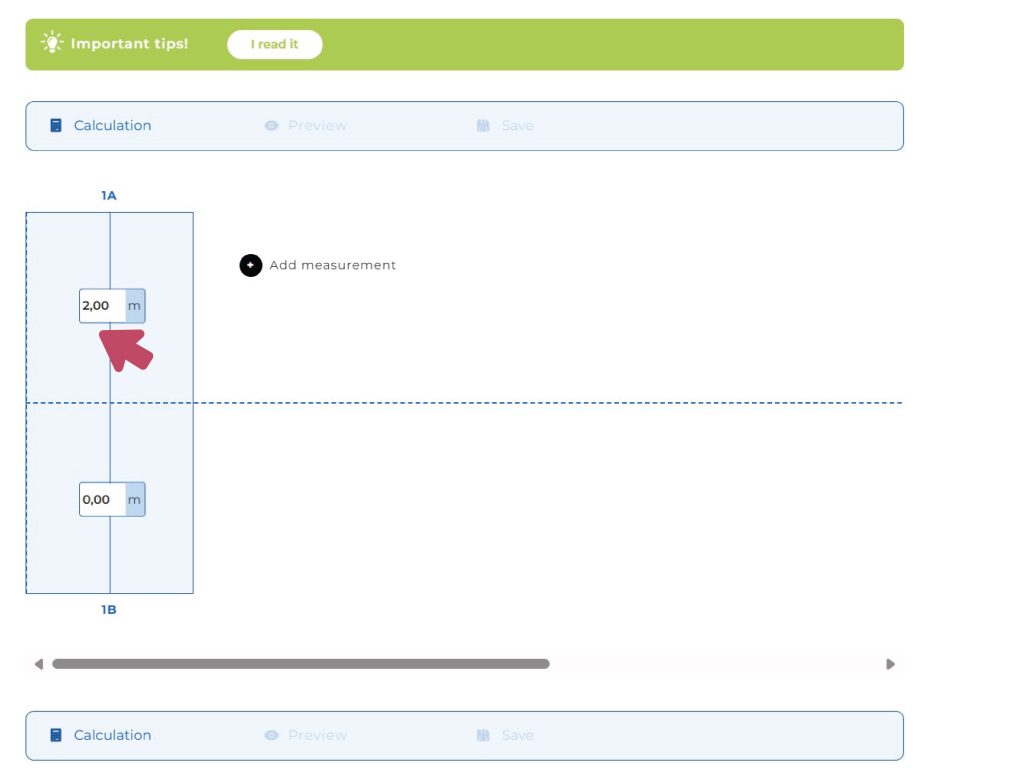
Enter the rib length labeled 1B from your paper into the designer.
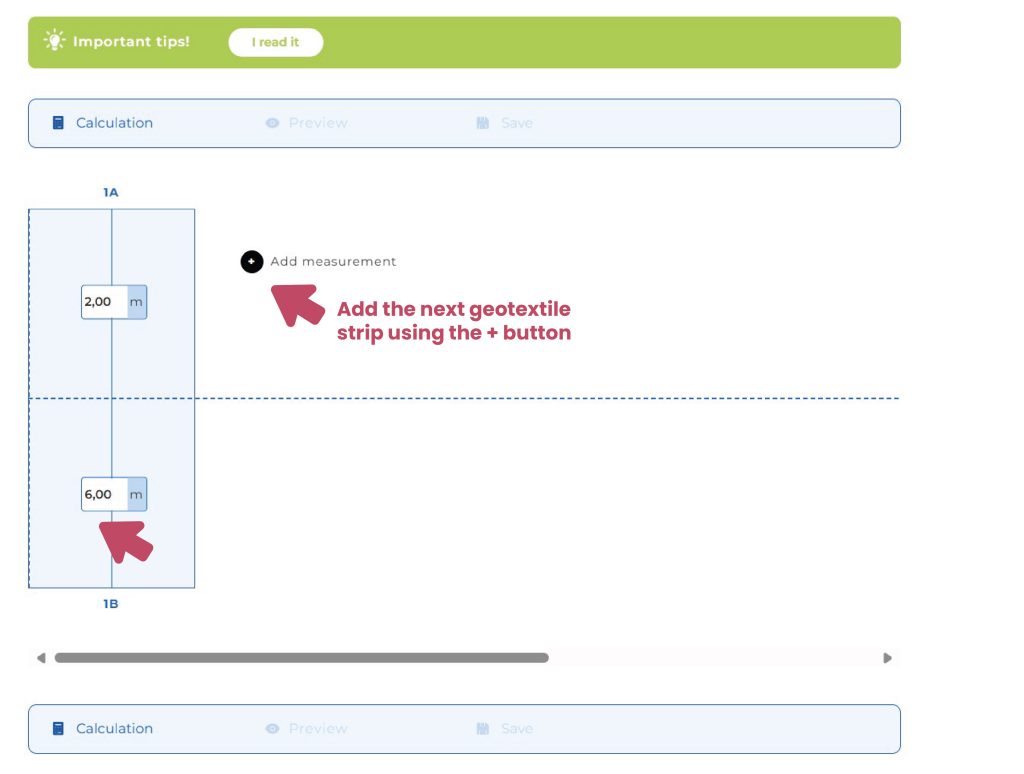
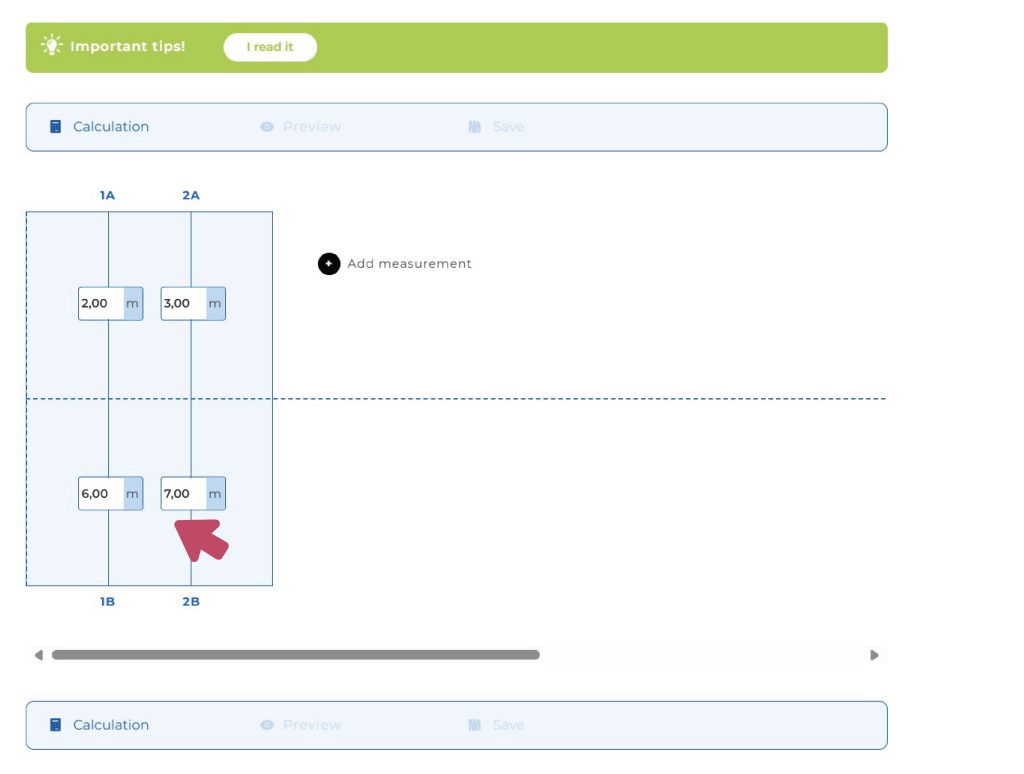
Click the + button to add the next geotextile strip to the designer #
Enter the rib length labeled 2A from your paper into the designer.
Enter the rib length labeled 2B from your paper into the designer.
Continue entering the values this way until all rib lengths have been added to the designer.
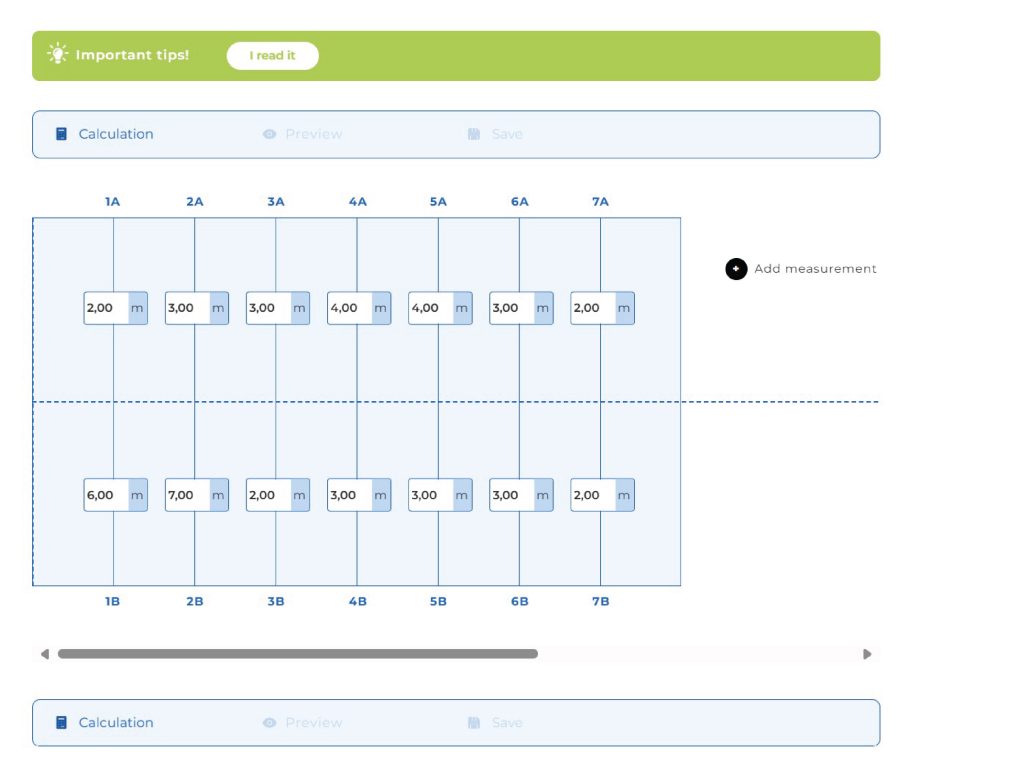
By clicking the Calculate button, you’ll see how much the planned geotextile will cost.
By clicking the Preview button, you can also see what your geotextile will look like.
You can even save the finished design for yourself.
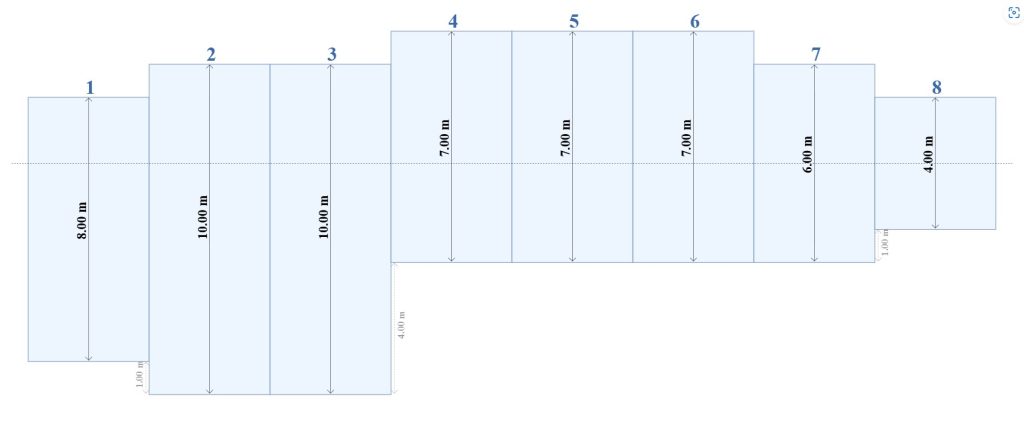
It’s possible that you’ll see one more geotextile strip in the preview than the number you entered — but that’s okay! #
It’s important to know that the number pairs you enter don’t determine the length of each strip, because the calculator/designer will calculate that based on the upper and lower values! In fact, during the survey, the number pairs represent the measurements taken along the welding joints.
That’s why there will be one more strip than the number of pairs you entered.
Important:
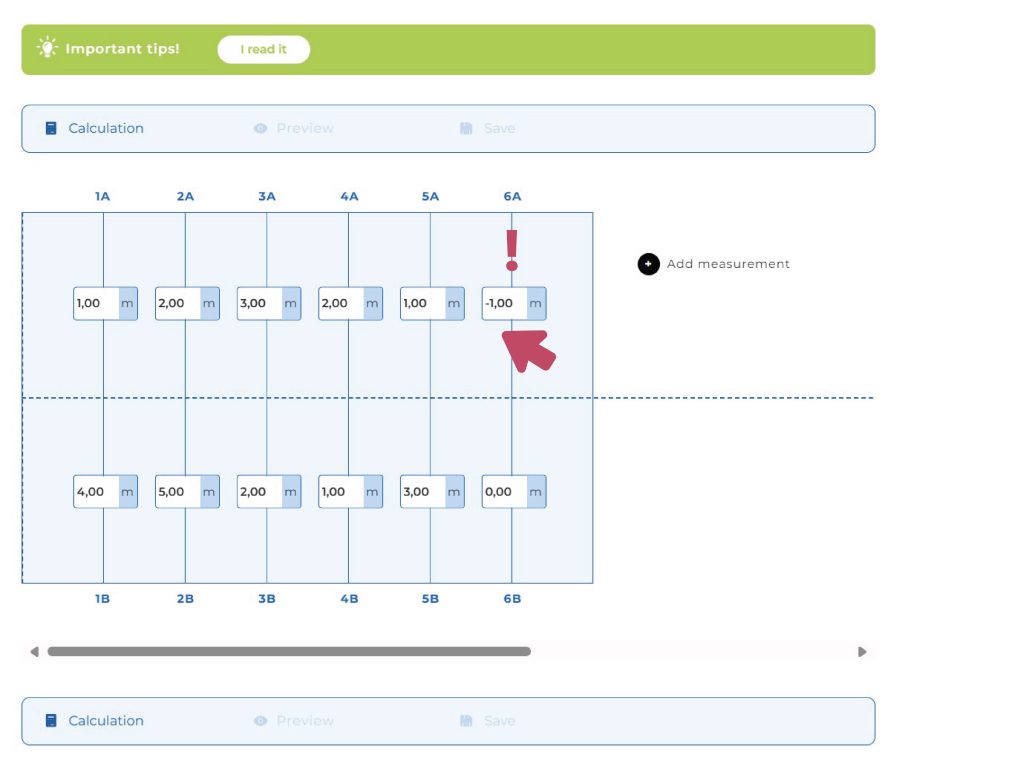
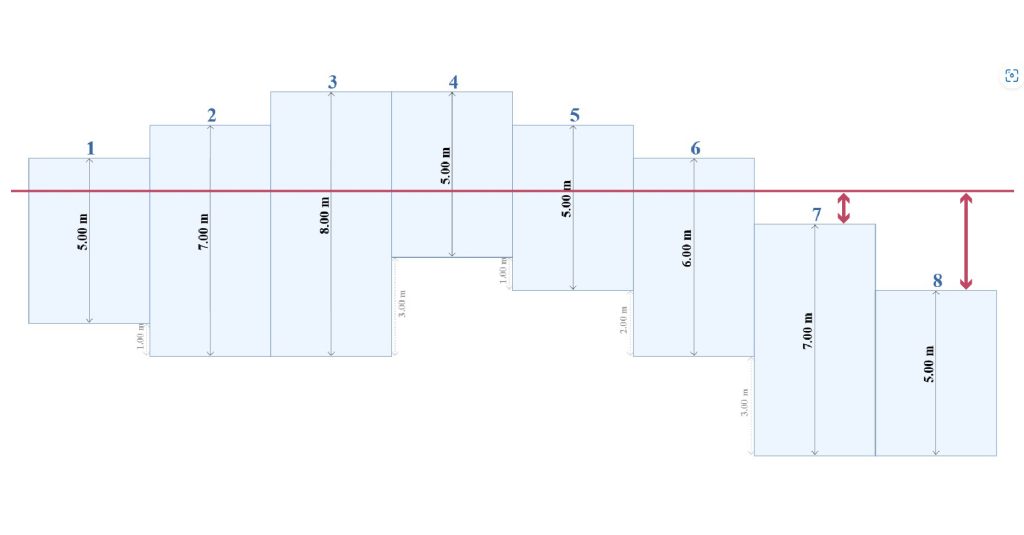
If you enter a negative value for one of the measurements, the measurement will shift that much in the opposite direction from the spine. For example, if you enter -1 for 6A, then the 6B measurement will start 1 meter lower from the spine.
This will be important for pond shapes where measurements can only be taken on one side of the spine line.
Step 1: Enter the values into the designer as shown above #
Then enter the negative value — in this example, for 6A.
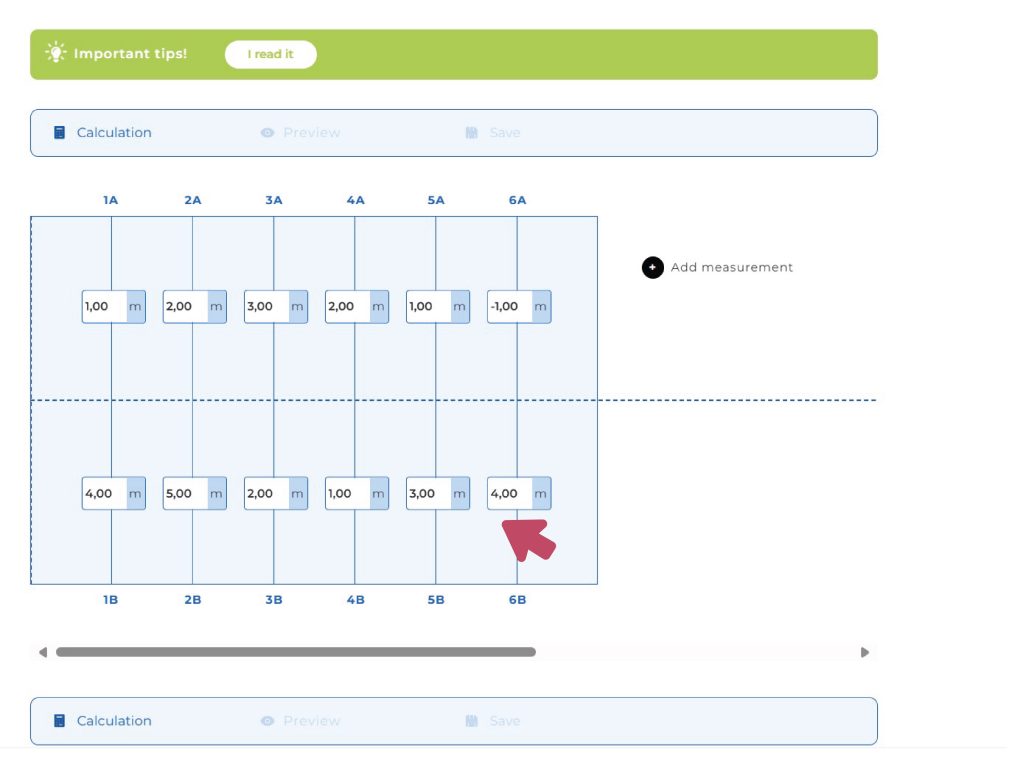
Enter the value for 6B in the usual way.
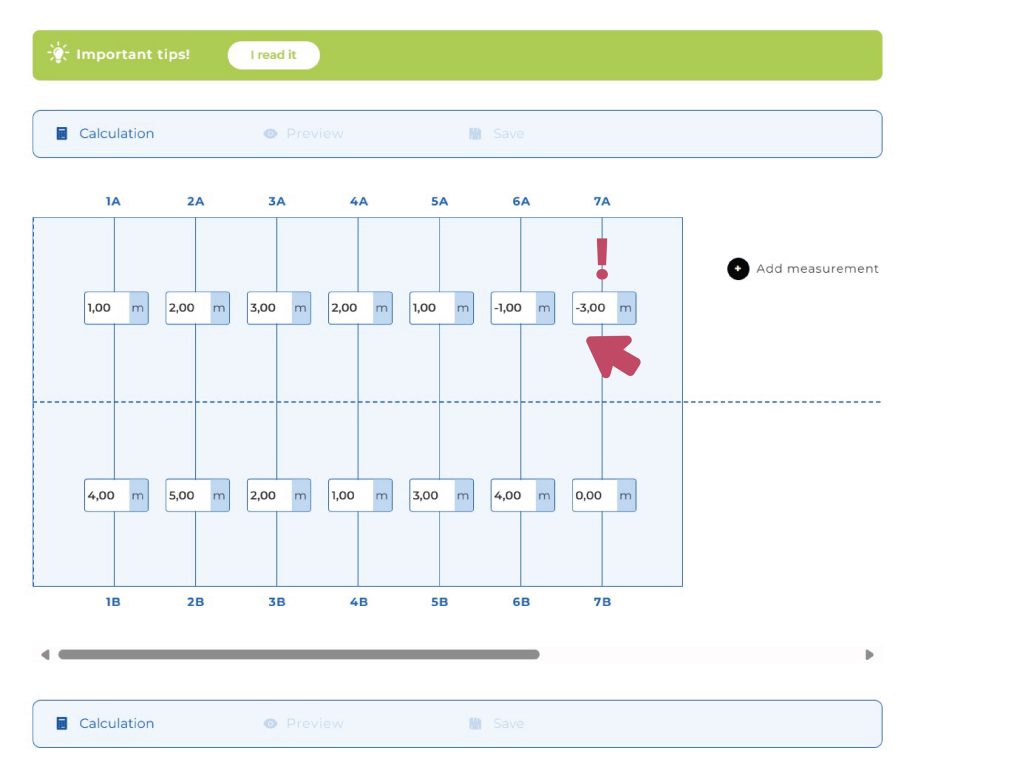
Next, enter a negative value again — this time for 7A.
Enter the value for 7B in the usual way.
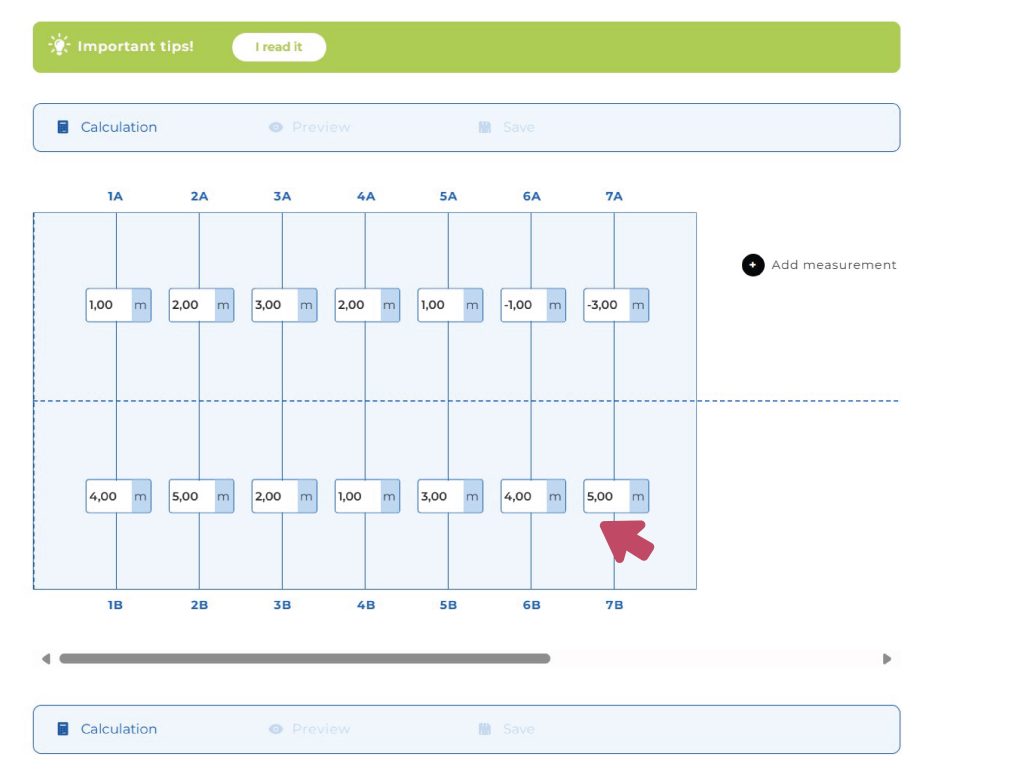
If all measurements have been entered, by clicking the Calculate button you’ll see how much the planned geotextile will cost.
By clicking the Preview button, you’ll also see what your geotextile will look like, and you’ll notice that the two geotextile strips entered with negative values are shifted from the spine line.
You can also save the finished design for yourself.
It may also happen here that you’ll see one more geotextile strip in the preview than the number you entered — but that’s okay! #
It’s important to know that the number pairs you enter don’t determine the length of each strip, because the calculator/designer will calculate that based on the upper and lower values! In fact, during the survey, the number pairs represent the measurements taken along the welding joints.
That’s why there will be one more strip than the number of pairs you entered.
After that, all you need to do is add the product to your cart, and within a few days, your custom-made, perfectly sized geotextile could be at your doorstep! #